The Airbnb Host Tech Stack: Tools That Save Time & Stress
“Tech stack” can mean two things:
- A pile of subscriptions you barely use.
- A set of tools that make hosting calmer, more consistent, and easier to scale.
This post is the second one.
If you’re trying to build an Airbnb host tech stack, the goal isn’t more tools. It’s fewer decisions during the week.
It’s written for product‑aware hosts (you already know tools like Be My Guest exist) who want a practical stack for 1–2 properties—without turning hosting into a software project.
How we built this stack (the criteria)
Every tool in this list earns its place if it improves at least one of these:
- Guest clarity: fewer “what do I do now?” moments
- Host time: fewer repeat tasks and messages
- Accuracy: info stays current with minimal effort
- Reliability: backups exist when something fails
- Privacy + trust: tools comply with platform rules and guest expectations
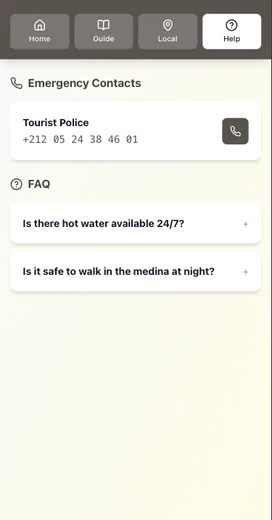
Layer 0 (required): One source of truth for guest info
Before you add gadgets, fix the root cause of 80% of guest questions:
- information is scattered (messages + binder + PDF)
- information goes stale (WiFi, parking, checkout)
Airbnb’s own tools push you toward a single source of truth: guidebooks are easy to share and keep updated, and guests can access them from the listing or Trips tab.
Minimum setup:
- one mobile‑first guide
- one link you reuse in pre‑arrival + check‑in day messages
If you want the before/after impact, see: Before vs After: How Digital Guides Transform Guest Experiences.
Layer 1 (required): Messaging automation that still feels human
The best host stack starts in the inbox.
Airbnb supports quick replies and scheduled quick replies so you can:
- reuse templates
- insert guest/listing details
- schedule messages based on triggers (booking, check‑in, checkout)
- edit/skip upcoming scheduled messages
Minimum setup: 6–8 quick replies + 3 scheduled messages (pre‑arrival, check‑in day, checkout reminder).
If you want the tone framework, read: Automation Without Losing the Personal Touch.
Layer 2 (high leverage): Access control (smart lock + backup)
A smart lock isn’t about being “modern.” It’s about removing the most stressful moment of the stay: getting inside.
If you’re in the US or Canada, Airbnb supports connecting compatible smart locks so unique door codes are automatically generated and shared with guests, and codes are active during the guest’s trip. Airbnb also supports adding a backup entry method that’s used when the smart lock isn’t usable.
Minimum setup:
- one primary entry method
- one backup entry method (physical key/lockbox)
- one photo of the entry door + one photo of the lock
For the full step-by-step, see: Creating the Perfect Check-In Experience (Without Being There).
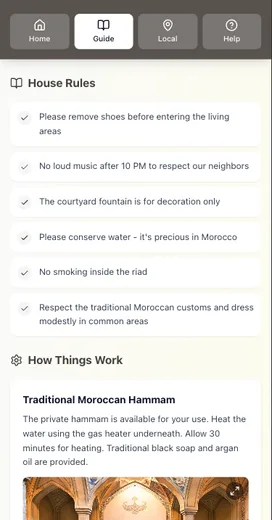
Layer 3 (required): Turnover ops (checklists + inspections)
This is where “pro hosts” separate from “always busy hosts.”
The Vacation Rental Management Association’s housekeeping standards emphasize inspections before guest arrival—because cleaning is not the same as “ready.”
Minimum setup:
- a turnover checklist (room by room)
- a 5‑minute inspection checklist (photos help)
- a maintenance triage list (urgent / blocking / annoying)
If you want the big‑portfolio version, see: How Property Managers Handle 50+ Listings.
Layer 4 (optional, high ROI): Pricing tools
You can run pricing manually. But most hosts underprice busy weekends and overprice dead weeks.
Two paths:
- Airbnb Smart Pricing: built‑in, you set a min/max range, and it adjusts automatically.
- Dynamic pricing tools: third‑party tools (like PriceLabs) that publish price and minimum‑stay updates to platforms/PMSs based on demand signals and custom rules.
When to use which:
- Start with Smart Pricing if you want the simplest setup.
- Consider a dynamic pricing tool if you have strong seasonality, events, or you want tighter control over minimum stays and gap nights.
Layer 5 (optional): Privacy-safe monitoring (noise + exterior)
If you host in a shared building, have close neighbors, or have party risk, monitoring can protect the stay and the neighborhood.
But it has to be privacy‑safe.
Airbnb’s policy is clear:
- No indoor security cameras in homes.
- Noise decibel monitors are allowed in common areas if disclosed and not placed in bedrooms/bathrooms/sleeping areas, and they assess sound levels without recording audio.
Some noise-monitor vendors also emphasize “no conversations recorded” and provide disclosure language. (Still: always disclose, and follow Airbnb’s policy plus local laws.)
Layer 6 (recommended): Lightweight analytics (know what to fix)
Even as a small host, track the same core hospitality metrics professionals track:
- Occupancy
- ADR (average daily rate)
- RevPAR
You don’t need a dashboard to start. A simple spreadsheet works.
Once a month, scan reviews and messages for the top repeated friction point, then fix one thing.
The stacks (pick the one that matches your reality)
The “Solo Host” stack (1 property)
- Digital guide (one link)
- Airbnb quick replies + scheduled quick replies
- Smart lock + backup entry method (or lockbox + confidence photos)
- Turnover checklist + inspection checklist
- Basic metrics tracking (Occupancy / ADR / RevPAR)
The “I have help” stack (co-host/cleaner)
Add:
- Clear co-host permissions and roles
- Shared checklists + photo handoffs
Airbnb supports co-host permissions (including messaging and calendar access), which helps you delegate without losing control.
The “Two listings, high turnover” stack
Add:
- Smart Pricing or dynamic pricing tool
- Noise monitoring (only if needed, and disclosed)
- A monthly “guide update” routine (WiFi/parking/checkout)
If you want the quick version, see: How to Update Your Welcome Guide in 60 Seconds.
Where Be My Guest fits (the simplest upgrade)
If you’re already product‑aware, here’s the simplest way to describe the value:
- One mobile‑first guide that guests can actually use
- One link you reuse in every message
- Updates happen once, so the info stays current
- Optional offline‑friendly experience after first load
That’s the “Layer 0 + Layer 1” foundation in one place—and it’s where most time savings come from.
Want the tech stack checklist?
We built a one‑page Airbnb Host Tech Stack Checklist so you can choose tools by outcome (clarity, time, reliability) instead of hype.
Conclusion: a calm Airbnb host tech stack beats a fancy one
If you take nothing else from this list, take these five principles:
- Start with one source of truth (your guest guide) before buying gadgets.
- Use timed messages + quick replies to deliver the right info at the right time.
- Treat access like an ops system: primary entry + backup entry, always.
- Add tools only when they reduce failure risk (turnovers, pricing, noise) or save real time.
- Keep trust intact: disclose devices, avoid “creepy” monitoring, and follow platform rules.
If you want the simplest foundation, Be My Guest covers the “source of truth” layer (one mobile-first guide link you reuse everywhere) so everything else in your stack has less work to do.
Resources
Related posts
- Before vs After: How Digital Guides Transform Guest Experiences
- Automation Without Losing the Personal Touch: A How‑To Guide
- How Property Managers Handle 50+ Listings (And What You Can Learn)
- How to Update Your Welcome Guide in 60 Seconds (Digital vs Print)
- Creating the Perfect Check‑In Experience (Without Being There)
External sources
- Airbnb Help: Guidebooks on Airbnb (guest access)
- Airbnb Help: Create and send quick replies (auto-translation note)
- Airbnb Help: Scheduled quick replies (edit/skip before sending)
- Airbnb Help: Co-host permissions
- Airbnb Help: Connect a smart lock to Airbnb (eligible US/CA + compatible locks)
- Airbnb Help: Backup entry instructions for smart locks
- Airbnb Community Policy: Cameras, recording devices, noise monitors, smart devices
- VRMA: Standards & Practices (inspections before guest arrival)
- STR: Glossary definitions (ADR, RevPAR)
- Airbnb Resource Center: What is Smart Pricing?
- Airbnb Help: Turn Smart Pricing on or off
- PriceLabs: Dynamic Pricing overview
- Minut Help Center: How Minut protects guest privacy